Quick Install
For a rapid setup, Docker is recommended:
docker run -d --name bifromq -p 1883:1883 apache/bifromq:4.0.0-incubating (latest)
For further installation alternatives and comprehensive details, refer to Installation.
Quick Verify
Below are the steps to quickly verify the basic MQTT functionality of BifroMQ using MQTTX.
-
Visit https://mqttx.app/ to download MQTTX and install it.
-
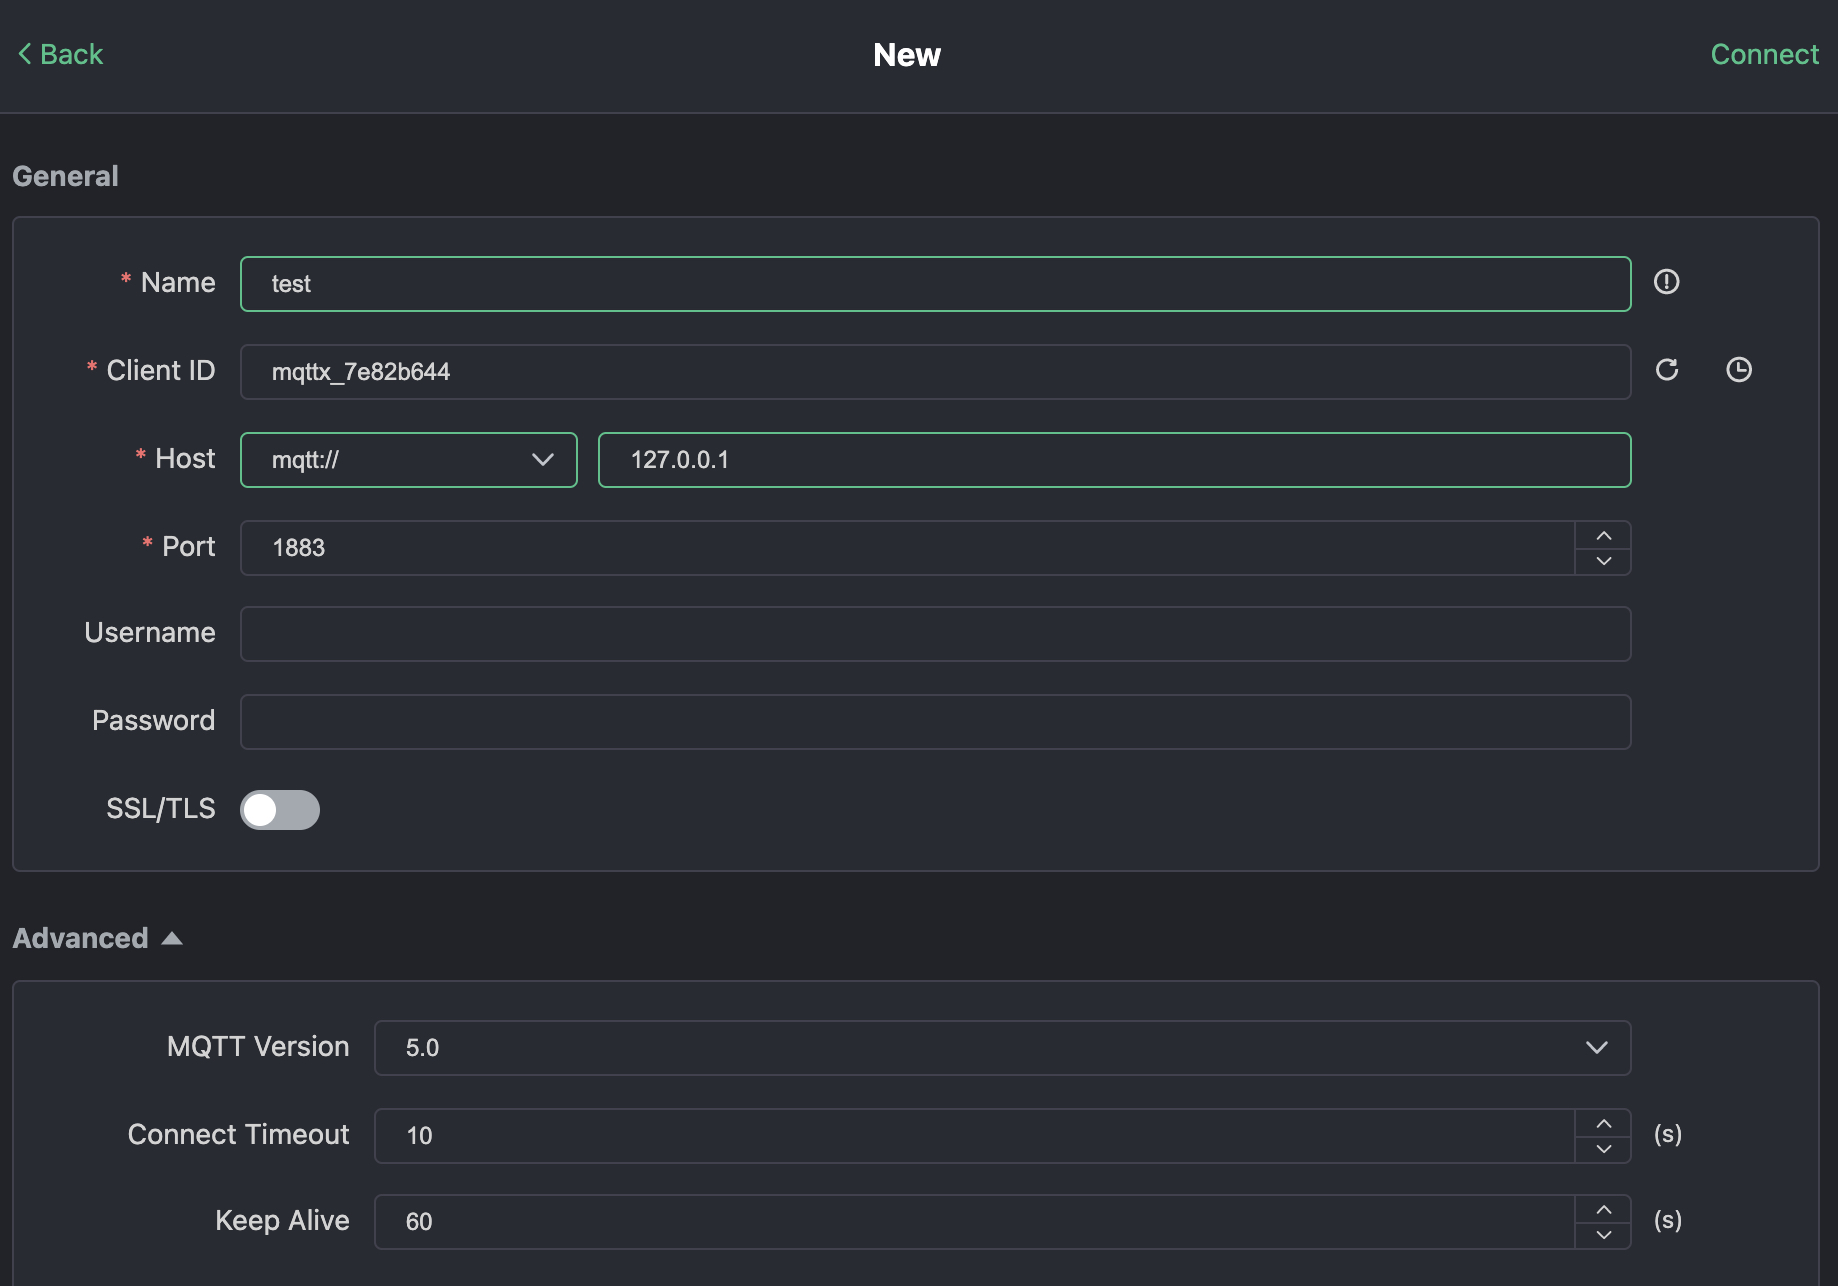
Open MQTTX and click on New Connection (the “+” sign on the left sidebar) to create a new connection configuration.
-
Fill in the required fields:
- Name: Any descriptive name of your choice.
- ClientID: Can be set manually or generated randomly. Must consist of "a–z", "0–9", "_", "-", ≤128 bytes, UTF8 encoded, and unique.
- Host: The connection address, including protocol prefix:
mqtt://<HOST>for TCPmqtts://<HOST>for TLS/SSLwss://<HOST>for WebSocket Secure
- Port: Select based on protocol:
- TCP:
1883 - TLS/SSL:
1884 - WSS:
443
- TCP:
- Username & Password: Provide credentials if configured; otherwise leave blank for test environments.
- MQTT Version: Choose from 3.1, 3.1.1, or 5.0.
-
After configuring, click Connect in the top right corner.
-
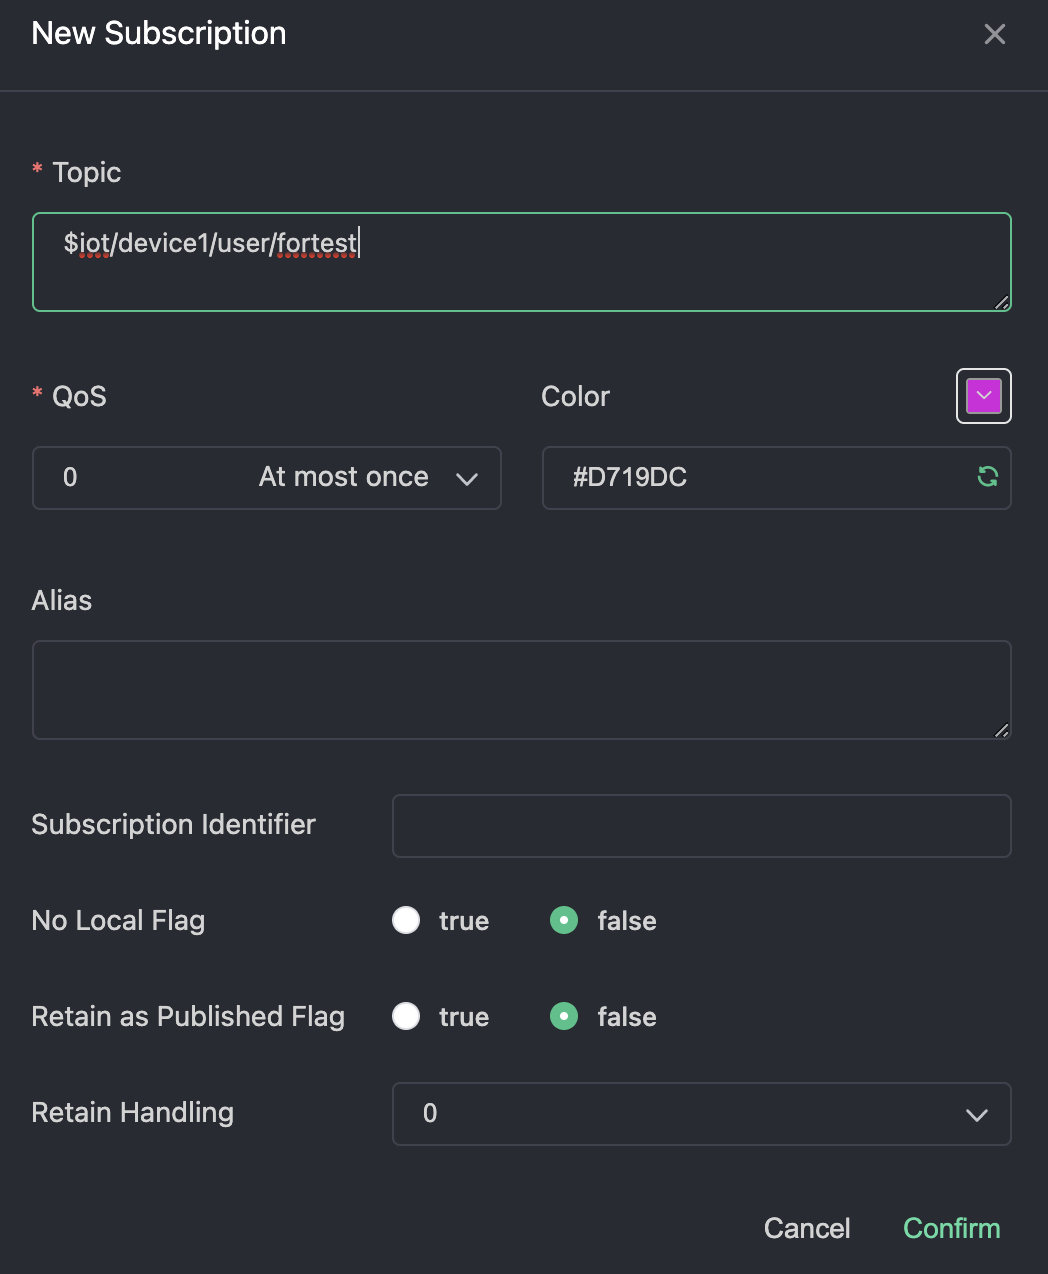
Subscribe to a topic: click New Subscription, enter the topic in the dialog, and confirm.
-
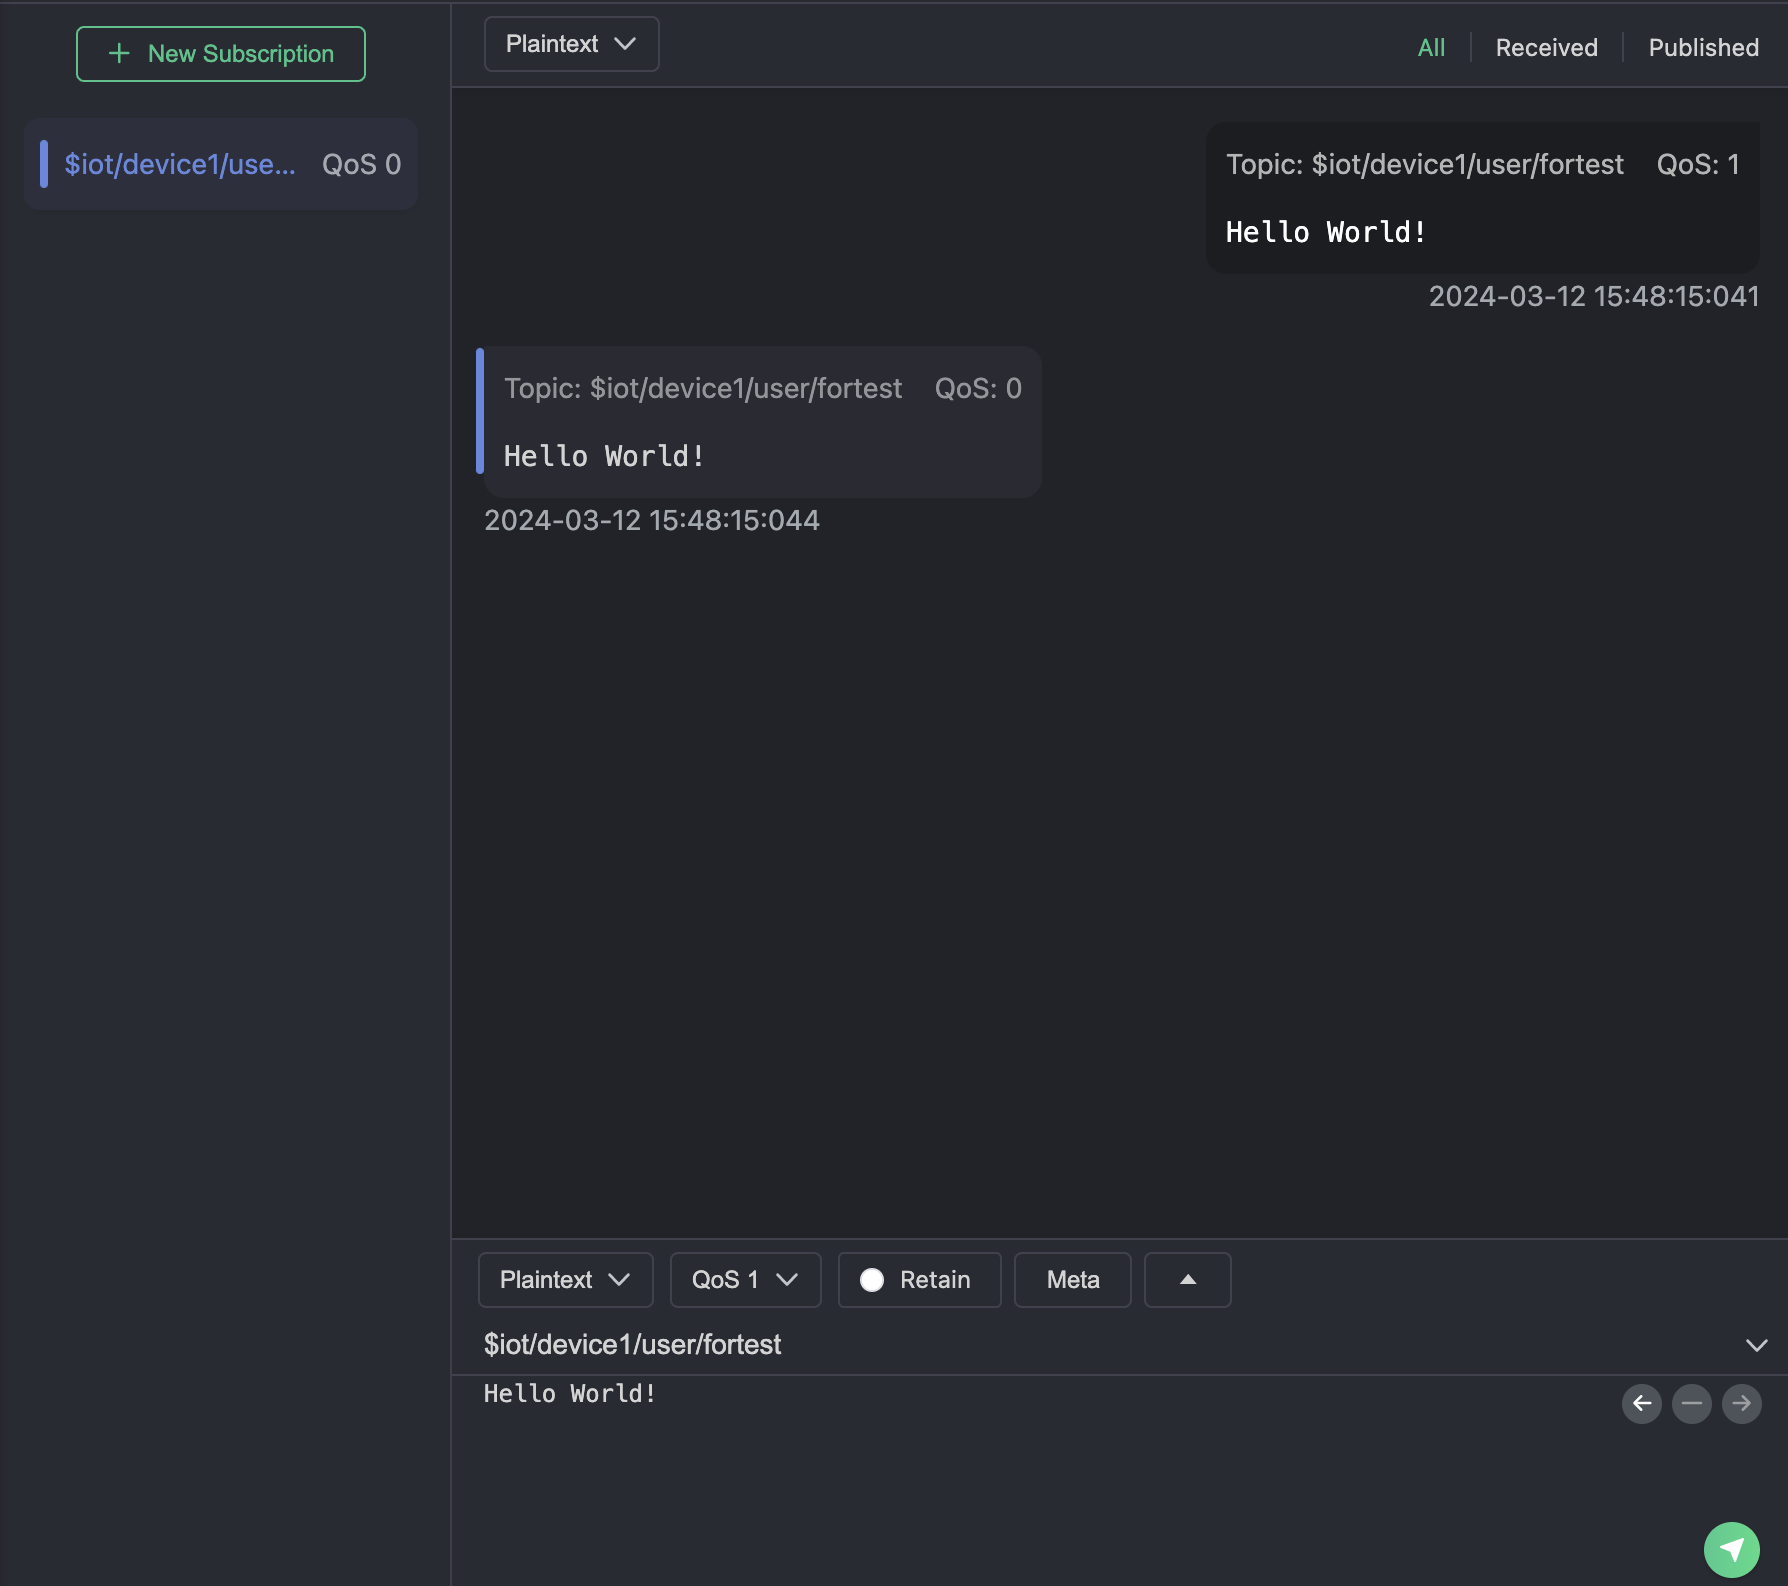
Publish a message: in the send/receive interface, enter the same topic, select QoS 0, type your message, and click Send.
-
You should see your published message appear in the interface.